Saturday, December 1, 2007

MySQL fails to start on Gutsy

For some reason, mySql wasn't starting up on my machine. It was easy enough to find the cause just by looking at the log. Apparently there was no /var/run/mysqld directory where mySql could write to. So I created the directory, gave the required permissions and didn't give it a second thought.

Turns out that when I rebooted my computer, mySQL wasn't starting again! The directory wasn't there anymore! Because I don't want to have to create the directory and start mySQL by hand each time the computer restart, here's what I did:

sudo gvim /etc/init.d/mysql

Just after the 'start') string I added the following content:

'start')
# Create directory in /var/run
if [ ! -d "/var/run/mysqld" ]; then
mkdir /var/run/mysqld
chown mysql.mysql /var/run/mysqld
fi
# All done

Thursday, November 29, 2007

Changing the default gateway using Network Manager

I have an oddball network configuration at home. I have a wireless D-Link router that connects to a Huawei router that in turn connects to the internet. So far so good.

The problem is that I want to use the D-Link router DHCP Server, but I want to use the Huawei router as default gateway... and there is no way to specify that in the D-Link router.

The solution I had so far implied setting the connection manually in Ubuntu, and that works fine... Apart from the fact that I have no fast way of setting up a VPN! So I decided to give it one more go with Network Manager, and turns out it is pretty easy to change the default gateway for a particular interface.

To do that, just create a file in /etc/network/if-up.d/ and call it gwconfig for instance.

sudo gvim /etc/network/if-up.d/gwconfig

In that file, check for the interface that you want (e.g. eth1), delete the default gateway that is messing up your system (e.g. 192.168.0.10) and add the the one you really want (e.g. 192.168.1.1).

#!/bin/sh

if [ "$IFACE" = "eth1" ]; then
route delete default gw 192.168.1.10
route add default gw 192.168.1.1
fi


Make sure you make the file executable and you're done.

sudo chmod a+x /etc/network/if-up.d/gwconfig

Set the network to Roaming Mode, and all should work fine. If it doesn't, try to disable and re-enable the network on Network Manager.

Btw, I still wasn't able to make the VPN work with this configuration... more on that later.

Thursday, November 22, 2007

Greasemonkey tips

Greasemonkey is a great Firefox add-on that allows you to add custom JavaScript to any web page. This simple concept allows you to do extraordinary changes to a web page and you can find a lot of pre-made scripts around. But if you want to do your own scripts, there's a few things that you should know before you start...

Registering events
Let's say you want to catch a button click. Here's how to do it:

var button = document.getElementById(buttonId);
button.addEventListener('click', myFunction, false);

Don't do stuff like button.onclick = "myFunction()" or even button.onclick = myFunction. It won't work.

Accessing element properties
Suppose you want to add some information to a link that you created to use during the onclick event. You must do it with:

lnk.setAttribute("attrName", value);

and fetch it with:

lnk.getAttribute("attrName");

Doing lnk.attrName or lnk["attrName"] will not work, and will return null when you access it.

Parameters in Event Handlers
Let's say you registered an event like mentioned above. The event always receives a MouseEvent argument, so you should declare the function like myFunction(evt). This is important because if you by accident register as an event handler a function that takes a boolean paramenter, like myFunction(flag), flag will always be "true" when called from the event.

Stopping the bubble
Assuming you defined your function like mentioned earlier, myFunction(evt), you can stop the event from bubbling by calling

evt.preventDefault();

Testing functions
Because Firebug is such a great tool to debug your scripts, you may want to check for Grasemonkey functions before you use them. Do it with something like:

if (typeof(GM_getValue) != "undefined")

And you should be able to run the script outside Greasemonkey for easier debugging.

More tips
Well, so far these were the problems I faced! :-) I'll update this as I keep discovering Greasemonkey's idiosyncrasies.

Thursday, November 1, 2007

Upgrading to Gutsy Gibbon

Ubuntu has launched a new release last October, Gutsy Gibbon. I was really eager to try it out, so I clicked the magic button to do the upgrade, just like I did last April.

Turns out that this time things weren't so easy... For some reason my Update Manager had been giving me trouble for a couple of weeks. And the Gutsy upgrade was the worst time for things to go really bad.

To start with, the upgrade seemed to stop at some point for no apparent reason. Because the upgrade script is made in Python I decided to try to figure out what was going on. For some inexplicable reason, the confirmation dialog was freezing the installation... so I removed the call to the dialog and things seemed to move forward.

Obviously my happiness didn't last long, and the process stopped at the middle of the installation. No chance but to boot the computer and be prepared for the worst. Turns out the computer booted OK, Ubuntu loaded, but the system was so mixed up with new and old stuff, that X didn't start and apt-get was unable to recover the situation... oh well...

Still, I had text mode so I was able to backup all the things that I should have backed up earlier. I booted Windows and downloaded the Gutsy CD. And then I reinstalled everything.

Friday, August 24, 2007

Internet privacy with Firefox

If you don't want your girlfriend to know what you're watching online, you can use Firefox profiles to clear your footsteps. Here's how:

Start by printing this page, because you'll have to close Firefox in order for this to work. Next, launch Firefox with the -p option. If you're in Ubuntu, you can do this by pressing Alt-F2 and typing firefox -p at the "Run Application" window.

The profiles window will appear with only one profile called "default". Create a new one (let's call it private), select it and start Firefox. Next, go to "Edit", "Preferences" and in the "Privacy" tab untick all the "History" options. Tick the "Always clear my private data when I close Firefox", click the "Settings" button and tick all the boxes. Your private profile is now ready!

Now close Firefox and open it again with the -p option. Select the "default" profile and set the "don't ask me on startup" option. Run Firefox and make sure you have the old profile back (with history and all). Of course I'm assuming that's what you want by default.

From now on, each time you want to navigate to websites you don't want your girlfriend to know about (say, because you want to surprise her with a valentines gift), just execute Firefox by typing firefox -p private.

Wednesday, August 22, 2007

Sending emails via Gmail with Python

Whenever I need to send files from work to home I use gmail. Usually this email message consists of one single file (that may be a tarball) and has the file name for subject. In the "Automate Everything" spirit, I decided to build a script to do this task for me.

The first thing I had to do was find out how to send an email with an attachment via gmail. It wasn't too hard to find this information around the web, but it still took me the best part of an hour. So here's a simple Python script that sends an email with an attachment:

#!/usr/bin/python

import smtplib
from email.MIMEMultipart import MIMEMultipart
from email.MIMEBase import MIMEBase
from email.MIMEText import MIMEText
from email import Encoders
import os

gmail_user = "your_email@gmail.com"
gmail_pwd = "your_password"

def mail(to, subject, text, attach):
msg = MIMEMultipart()

msg['From'] = gmail_user
msg['To'] = to
msg['Subject'] = subject

msg.attach(MIMEText(text))

part = MIMEBase('application', 'octet-stream')
part.set_payload(open(attach, 'rb').read())
Encoders.encode_base64(part)
part.add_header('Content-Disposition',
'attachment; filename="%s"' % os.path.basename(attach))
msg.attach(part)

mailServer = smtplib.SMTP("smtp.gmail.com", 587)
mailServer.ehlo()
mailServer.starttls()
mailServer.ehlo()
mailServer.login(gmail_user, gmail_pwd)
mailServer.sendmail(gmail_user, to, msg.as_string())
# Should be mailServer.quit(), but that crashes...
mailServer.close()

mail("some.person@some.address.com",
"Hello from python!",
"This is a email sent with python",
"my_picture.jpg")

Wednesday, August 15, 2007

Dual monitor in Ubuntu

I bought a new 32'' LCD TV. A Samsung LE32S62. The TV comes with a VGA connection, so obviously I had to connect my laptop to it!

The first challenge was making Ubuntu work with dual monitor. I did a few searches on the web and found a few instructions on how to do this. I ended up with a rather simple configuration. Just edit the /etc/X11/xorg.conf file and add the following under the "Device" section. (NOTE: I'm using an nVidia graphics card. This may be different for your card)

Option "TwinView" "on"
Option "TwinViewOrientation" "RightOf"

Next restart X (Ctrl-Alt-Backspace) and you should end up with dual monitor. This isn't exactly brilliant, because the TV ended up as the main monitor, and I would prefer to have the laptop as the main monitor. But after a bunch of failed tries I just gave up. After all, I don't think I'll use this setup a lot of times. (but I am thinking on recovering my old computer to use it as a media center!)

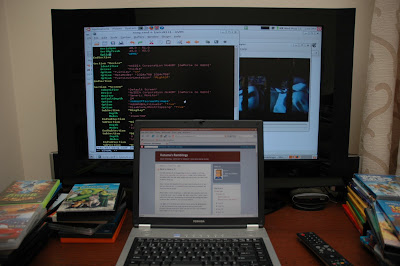
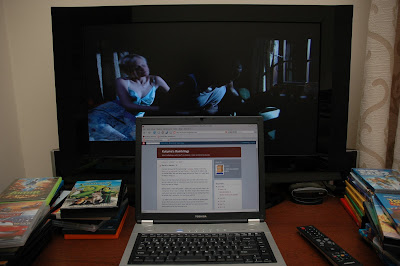
Here's a couple of pics of the setup:


Setting up xorg.conf with gvim


Watching a movie with VLC

Sunday, August 12, 2007

Back to basics: Vi

I've been doing a lot of programming in Ubuntu, mostly in PHP (my sister's in law web site), Perl and Python. I tried a lot of editors and (so called) IDEs, but was never happy with any of them. So I went back to basics: using Vim.

Now, I can ear the screams of Emacs users and the cries of all of you who only learned the :q! shortcut to exit Vi as soon as possible, but here's my view on things:

Emacs users: I tried using Emacs. I really did. And I actually used it for a long time while I was in college. But after using Vi for a while I had a really hard time both remembering the shortcuts and configuring Emacs to behave like I wanted to. So I just stuck with Vi.

:q! users: Vi is not that hard. Really! It does need a bit getting used to, but the freedom of not using the mouse and all those small shortcuts that you think you'll never use but turn out to be extremely useful make up for the learning curve.

To speed up your learning curve, here are the two secrets to loving Vi:
  • A proper .vimrc file
  • Knowing the right commands
Because there are so many "right commands" I'll leave that to a later post. Let's focus on the .vimrc file for now. And just to get your expectations in the right place, I'm not a Vim power user. If you look the web for .vimrc files you'll find files with hundreds of lines of code. Mine has 25, including comments... But it makes Vim behave like I want, so it's enough. Just go through the code and comments and you'll be able to understand what the configurations do. If not, drop me a line.

NOTE: The last 2 lines are wrong! Instead of [ you should have <. And instead of ] you should have >. But Blogger does a really bad job with these 2 characters....
" Turn on syntax highlight
syntax on
" Set tabs to 4 in size and make sure autoindent is on
set tabstop=4
set autoindent
" Make backspace work as in most editors
set backspace=indent,eol,start
" Black background and white foreground
highlight Normal guibg=black
highlight Normal guifg=white
" Make the default window size 50x80
set lines=50
set columns=80
" Store temp and swap files in this directory
set directory=/tmp/
" Show the status line
set ls=2
" Set the status line to:
" Filename [Modifed & Readonly Status] line number/total lines column (#buffer)
" More info at:
" http://www.winterdom.com/weblog/CommentView,guid,3372fa1e-966e-4389-b2ba-bb2ce527f52a.aspx
let &stl="%f %([%R%M]%)%=%l/%L %c (#%n)"
" Map Ctrl-Ins and Shift-Ins to clipboard copy paste (FIX THIS!!!)
map [C-Insert] "+y
map [S-Insert] "+gP

Saturday, August 11, 2007

Objects in Perl? Use Python!

I've been meaning to try Python for a while. I'm kind of a sucker for programming languages, and knowing a bunch of languages allows me to choose the right tool for the right job. Turns out that this week I had the perfect opportunity to check out Python.

The task at hand was analyzing patterns in a bunch of XML files. I had 270Mb of XML files, and the largest file was 32Mb. Because I was pretty sure I was executing the analysis more than once (errare humanum est and I want to improve the analysis in the future) I decided to use SAX to read the files.

Having decided to use SAX I then decided to use Perl to do the job. I'm pretty familiar with it and was able to quickly find a SAX sample. Besides, I had a few string matches and replacements to do, and Perl is a great language for that.

Turns out that using SAX in Perl demands that you use and define objects in Perl. And it turns out that defining objects in Perl is... well, terrible! I really hated the syntax, bless and the way attributes were defined. It all looks like a big hack! To add insult to injury, the perlSAX has a few quirks when changing handlers. This is mandatory to make your SAX code maintainable... So I dropped Perl and went for Python.

To my surprise the transition was really easy. I was able to convert my Perl code to Python very quickly, with only a few doubts now and then on specific stuff. Here's what I gained from the transformation:
  • I learned Python (finally!)
  • Better SAX handlers (the quirks that happen in Perl don't happen in Python)
  • Clearer attribute access (if you have an object with a reference to an array of references and want to print it in Perl... things can get weird)
  • Clearer object definition and usage (no bless!)
  • Fewer lines of code (from ~250 to ~150)
  • Same performance (I was worried about this, but both scripts took the same time to execute!)
I still love Perl. If I want to parse a bunch of text files, do text transformations and the like it will be my 1st choice.

But whenever I need to do something a bit more complex that requires complex data types or OO programming, from now on I'll definitely turn to Python!

Sunday, July 29, 2007

Web Testing

Last week I updated my sister's in law web site to have expanding folders. The solution I implemented is far from perfect but it does the trick. And since I used the prototype framework for the JS code, I figured it shouldn't have any problems in either IE or Firefox. I was wrong...

Turns out I forgot to test the web site in IE, and the first time my wife went there to take a look, it didn't work. Apparently nextSiblings doesn't work properly in IE... so instead of:

my_element.nextSiblings()

I had to do:

Element.nextSiblings(my_element)

This is really a pain for me because it means I have to test the site in both IE and Firefox all the time. And since I use Ubuntu, that didn't seem like an easy task. Wrong again!

There's a project called IEs4Linux that allows you to run IE on any computer that runs Wine. So I followed the instructions on the website, installed the thing, and in about 5 minutes (mostly because of download times) I was running IE 6 on my Ubuntu machine. I actually found out and solved the above problem all in Ubuntu. Sweet!

Sunday, July 22, 2007

Use source control. Always!

So you're doing this simple project, you have a bit of PHP, a bit of mySQL, you add a dash of really cool JavaScript, you publish it to the server and... BANG! Everything stops working!

Guess what? It happened to me this week. Because of a rather simple thing, actually. In my development machine I have mySQL 5, and the server machine has mySQL 4. My beautiful queries were all failing.

It actually took me about 2 minutes to fix the problem. Get the latest running version from source control (I'm currently using SVN) publish it and that's it. And during those 2 minutes I just kept thinking, "I'm *so* glad I have this in source control!"

Listen to experience. Use source control. Always!

Friday, June 29, 2007

Video Editing and Ubuntu

Last weekend I had to edit a video for work. It was nothing too fancy. I had about 45 minutes of video on tape and I wanted to save parts of it to my computer (the takes). Then I wanted to cut the takes into pieces (the scenes), edit it as I pleased and add some background music.

Let me go straight to the conclusion: I gave up and did it all in Windows. How depressing...

I was able to capture the video to disk without problems (I think I used Kino for that), but the editing part was really bad.

I tried out Pitivi but it just hang after a few clicks. Then I tried Kino but unfortunately it is too basic. No ability to add the background music (actually I think there's a way, but 2 audio channels is still to limited).

Then I found Cinelerra. I tried everything to make Cinelerra work properly, I even fixed the dreaded startup error regarding the shmmax parameter. And although the software looks very promising, it is full of bugs that make it completely unusable... It's a shame really.

I did manage to do a test video in Cinelerra. The video had cuts, background music, the works. But while doing this video the preview was out of synch (and that makes editing really hard), I had to restart the software at least 20 times (no kidding) and when I got to work with my new video to show my colleagues what a great editor I was, I couldn't make it play on a Windows machine!

So I went back to my Windows partition, installed VirtualDub and another video editor I can't remember the name right now and was able to do the job hassle free... 1 down for free (as in speech) software. :-(

PS: To fix the dreaded startup error regarding the shmmax parameter edit the file /etc/sysctl.conf and add the following:

# make cinelerra happy
kernel.shmmax = 2147483647

You'll need to reboot for the changes to take effect.

Wednesday, June 13, 2007

Why I am not buying a Mac

Yearly this year I was strongly considering buying a Mac. The design is so cool, OSX seems like a great OS, they have TextMate and people I know that own Macs don't miss a chance to tell me how great it is.

But as time went by I changed my mind. Here's some of the reasons why this happened:
  1. The $$$ factor: I don't really need a Mac. Actually, I don't even need a new PC. It's a way too expensive whim.
  2. iPod: I own an iPod. I love it. It's a great MP3 + video player but it does have its flaws, specially when it comes to iTunes. There's just some things it won't do right (like podcast handling) and it has a few bugs that cause my artwork to vanish from time to time. Fortunately Media Monkey solves my problem, but it does make me wonder about other Apple software.
  3. It burns: A friend of mine has a MacBook Pro. The hand rest heats to a point where it is actually uncomfortable to rest your hands. This is an issue to me because I actually use the hand rest to... well, rest my hands! I returned a laptop because of this same problem, so it's a no go for me.
  4. Safari: I downloaded Safari for Windows. It crashes as soon as I type something in an input box. Again my faith in Apple software went downhill.
  5. Ubuntu: When I first considered buying a Mac I was using Windows. My machine was getting slower and slower by the day, so I believed I needed a new machine... Now I use Ubuntu and that problem is gone. And Ubuntu may not be as cool as OSX, but it is a cool enough OS.
  6. Fanatics: The legion of Apple fans makes me more uncomfortable than reassured. They always assume Steve Jobs is right and that everything about Apple is great. This means they have a high tolerance to problems and that they don't talk about those problems. This is not an exclusive problem of Apple, it's a problem that occurs every time a technology issue is turned into a religious war (think Emacs vs Vi!).
With all this in mind I'll save my $$$ and keep this not so fast machine for at least another year.

Scribus vs Inkscape

My sister in law is having an exhibit next week. To help her out I did the paper invitations during the weekend. This was the first time I needed to do something like this in Ubuntu, so I did a test drive on two applications.

Due to an article on Full Circle Magazine I decided to give Scribus a go. I already new Inkspace by name so I also gave it a try.

The short of it: Use Inkscape. If you want to know why, here's the details.

Scribus
Scribus annoyed me a bit. The first bad experience was with the "new document" menu. It doesn't save your settings! I was doing a few experiments so I had to start new documents quite often... and typing all the settings all the time is a drag (I had to change 4 values for the margins and 1 value for the units).

The next thing I disliked was the line tool. When you draw a line it stays red (because it is selected) and wider than the line you actually draw. Pretty bad for WYSIWYG. Also, moving the thing around had some odd behaviors....

The next problem was undo. Not sure what it actually did... Sometimes it worked, sometimes it didn't... sometimes it did odd things. Like after moving the line, undoing deleted the line. Pretty bad.

The final annoyance was with the snap to guides. I set the option but it did nothing... it just kept not snapping. I gave up at this stage.

Inkspace
No questions asked when the software starts, the document is already there and it actually has the settings I wanted to use. Not bad.

Drawing lines was also as I expected, and after a web search on how to snap to the guides, it worked OK. And undo did what I expected.

After I did a bit of work on the actual invitation, I decided to move the files around to organize my folders. Turns out Inkspace stores the pictures as references, so I lost all the pictures I had in the drawing (about 9 pictures). Restoring the references seemed like a drag, but since the save format is SVG I was able to use a text editor and perform a simple find and replace! Not bad.

Then I wanted to add a new page. I wasn't able to find out how to do it! Fortunately there is the concept of layers, so I just used one layer for each page. I could have used another document, but since the invitation isn't that complex this solution was good enough.

Time to print! This was another surprise. You actually need to know the lp command details and how CUPS works to do some basic printing tasks (like printing more than one copy in normal mode). So much for a grandma friendly application. But at the end of the day I managed to print everything without a problem and the invitations were sent on time.

Here's the final result:

Thursday, June 7, 2007

Printing to PDF

If you need to print something to PDF in windows, you can do it with doPDF. I know there's a lot of other software that does exactly the same thing, but this one got my attention because:
  1. It is small (about 1Mb)
  2. It is free (as in beer)
  3. It is easy to use...
  4. ...but has advanced features for when you need them
In about 5 minutes (including download and installation) I had just what I wanted: a Word document printed in PDF, page size A4, 150 dpi's. Cool!

Sunday, May 27, 2007

VPN in Ubuntu

After my previous attempt at creating a VPN in Ubuntu I reverted all my work because I was rather unhappy with the results. After digging a bit more I found out I could actually use pptpconfig, as long as I didn't actually clicked the "Start" button. Here's the trick:

Start by installing pptpconfig. Add the following to your /etc/apt/sources.list file:

# James Cameron's PPTP GUI packaging
deb http://quozl.netrek.org/pptp/pptpconfig ./

Then install the app:

sudo apt-get update
sudo apt-get install pptpconfig

Now run it (sudo pptpconfig) and configure your VPN. In the "Routing" options, select "Client to LAN". Lets assume you called your new configuration MyVPN.

You can close pptpconfig. Go over to /etc/ppp/ip-up.d/ and create a new file called vpnroute (sudo gedit vpnroute). Assuming that the network you want to connect to uses IPs like 192.168.0.*, add this to the file:
#!/bin/sh
if [ "${PPP_IPPARAM}" = "MyVPN" ]; then
route add -net 192.168.0.0 netmask 255.255.255.0 dev ppp0
fi
Don't forget to make it executable, or it won't work:

chmod a+x vpnroute

And that's it. To start your VPN run:

sudo pon MyVPN

To stop it run:

sudo poff MyVPN

VPN in Ubuntu using Network Manager

UPDATE: I found a better way to connect to a VPN. Check this post.

Imagine you have a Windows Network at work and you're stuck at home waiting for the plummer to fix the sink. No problem, just connect via VPN to your workplace, launch a Remote Desktop and in no time you're working in that piece of code you must deliver yesterday. Being this such a useful and common scenario, how come it is so hard to set up in Ubuntu?

Here's how I managed to connect to my workplace via VPN using Ubuntu. Let me say upfront that I'm not particularly happy with the result, and I'll try to do it some other way in the near future. But if you're desperate this will do. This is not an How To, but rather a step by step description of the tries and failures. Maybe it can help someone that finds the same error messages I've encountered. Well, here goes:

First I tried pptpconfig. Everything seemed to be properly configured, but all I got was the error message:

Cannot determine ethernet address for proxy ARP (Update: Actually this is not a problem. Just add noproxyarp to the pppd parameters.)

So I decided to install the Network Manager PPTP package:

sudo apt-get install network-manager-pptp

And restarted everything that depended on the package:

sudo /etc/dbus-1/event.d/25NetworkManager restart
sudo /etc/dbus-1/event.d/26NetworkManagerDispatcher restart
killall gnome-panel
nm-applet &

The killall and nm-applet commands are there to restart the Network Manager icon on your gnome panel. If for some reason the Network Manager icon does not appear (happened to me) just execute:

sudo /etc/dbus-1/event.d/25NetworkManager start
killall gnome-panel
nm-applet &

If you click the Network Manager icon now, you should have a "VPN Connections" entry. Just configure your own VPN connection and it should appear in the list of VPNs. Click it. If it works, you're in luck. If it doesn't, keep reading.

To keep an eye on what's going on with the VPN connection, just tail syslog:

sudo tail -f /var/log/syslog

That's how I found this error message:

(...) no currently active network device, won't activate VPN.

I googled for a while and found that if you want to use Network Manager to take care of your VPN, you cannot have a Wireless Connection manually configured. Oh boy... So I opened the manual configuration, saved my current configuration and in the properties of the Wireless connection ticked the box "Enable roaming mode". Because I have a somewhat odd configuration of routers at home, I also had to reconfigure all the routers, but I won't bother you with that.

My main problem with the roaming mode is that it stores the WEP password in the keyring. That's all fine and safe, but it means that when I login, besides having to enter my username and password I also have to put my keyring password! Very annoying!

On with the show. Connect VPN. More mysterious errors in syslog:

LCP terminated by peer (+ bunch of characters blogger won't let my type)

This is a funny one! First because it was a bit lost in the middle of a bunch of error messages. Second because, at least to me, it means absolutely nothing! Using a bit of intuition I thought it might be an authentication problem, so I just ticked all the boxes in the "Authentication" tab in the VPN configuration dialog and... it worked! I have a VPN connection to my workplace!

Just for wrap up, here's what I didn't like about all this:
  1. It's a lot of work for something so common.
  2. Because the WEP is in the keyring I must enter the keyring password each time I login.
  3. I must use roaming for my wireless connection. This means the router must do the configuration, and my routers suck at that.
  4. PPTP logs are there for the people who know the code or the protocol by heart.
  5. I'll probably just revert to my old configuration and try a new way of connecting via VPN.I got back to my old configuration and managed to configure the VPN in a different way.
Saturday, May 26, 2007

Ubuntu, NVidia and Automatic updates

So you have your Ubuntu system up and running, you click the button to do an innocent software update and suddenly... Bye bye X! What happened?

Well, during my upgrade to Feisty I installed the NVidia drivers' packages and they were updated. And since for some reason Ubuntu's NVidia drivers still don't work, I lost my X! So, once again, it's back to w3m to download and install the NVidia drivers from NVidia's website...

This is easy to solve, but I would rather that it didn't happen again. So I removed the Ubuntu packages from my installation.

sudo apt-get remove nvidia-glx
sudo apt-get remove nvidia-kernel-common

After doing this you must reinstall the NVidia drivers, because removing these packages also deletes a bunch of required files. As a bonus, you win about 100Mb of free space. :-)

Sunday, May 20, 2007

Automate Everything!

The other day, while waiting for another computer reboot or something similar, I grabbed The Pragmatic Programmer from the shelf. I already read the book, so I was just quickly browsing the tips in the book when I found this one: "Automate Everything". (you can find it by looking for "Don't Use Manual Procedures" in the previous link).

I already do this at work, but I started thinking it would be a really good idea to start applying this principle to my home projects. Take my sister's in law website. Here's the procedure I use to upload it to the server:
  1. Open googleanalytics.txt and copy the contents
  2. Open pageend.php and paste googleanalytics.txt content
  3. Open gFTP
  4. Open KeePassX to fetch the site's password
  5. Use gFTP to transfer some of the directories in the development folder (this actually counts as about 10 steps!)
  6. Check if I didn't make a mistake in the gFTP 10 steps!
  7. Open pageend.php and remove googleanalytics.txt content
Some notes on these procedures: I never did steps 1, 2 and 7. It was too much work so I never actually got Google Analytics to work until yesterday. I'm not kidding about step 5 being about 10 steps... I actually uploaded the folders one by one to make sure I got all the right files and that the .svn folders weren't copied. This may seem rather stupid, but since I executed this procedure about once a month it wasn't really a problem, just a nuisance.

Still I decided to automate everything. I did a shell script and right now I have a one step procedure to upload the site:
  1. Run ./publish.sh
And what did I gain with this 2 hour or so investment?
  1. I learned more about bash programming
  2. I learned how sed works
  3. I learned about wput
  4. I got Google Analytics working on the website
  5. I'll be doing no more mistakes while uploading the site
  6. I can make small changes to the site without thinking about the dreaded upload process
  7. I feel like a better geek! :)

Saturday, May 12, 2007

Sandboxie

Are you looking for the best free text editor? Looking for the best wma to mp3 converter? It is quite easy to find free software to do these tasks, the problem is that after you install and test them all, your Windows installation is suddenly filled with registry entries and software you really don't want!

A while a go while browsing LifeHacker I read an article about a software that promised to end these troubles: Sandboxie. So I gave it a try.

I had some wma files to convert to MP3 files and found this free converter, so I installed Sandboxie and run the installer of the software. Everything went OK and the software was installed. I then run the free converter inside the Sandboxie and converted the files. Sure enough the converted files only appeared in the special folder selected by Sandboxie to be the sandbox.

I copied the MP3 files to a real folder on disk, turned off and cleared the contentes of the sandbox. And my Windows installation was exactly what it was before I installed the converter!

I only wished I knew about this software before testing 14 different text editors and totally trashing my Windows installation.

Saturday, April 28, 2007

Upgrading to Feisty

With all the media coverage Ubuntu Feisty is getting in slashdot, digg and others, I started thinking about doing the upgrade myself. I was just thinking how great it would be if there was just a simple button to click when I got the usual desktop notification from the Update Manager. And guess what? It had a button to upgrade to Feisty! So I clicked it.

What I loved about the upgrade:
  1. The button!
  2. The warnings about low disk space at the start, and not 20 minutes into the installation
  3. The download speed (it took about 25 minutes to download... I didn't know my ISP could do 900kb/s!)
  4. After the upgrade, stuff that wasn't working on my box started working again (Picasa)
What I didn't like so much:
  1. The warning about the disk space tells you how much space you need to free up, not how much space you need free (who reads the fine print anyway?)
  2. There are dialog boxes in the middle of the installation. It was late at night when I started the installation, and the estimated time was 45 minutes, so I went to sleep. When I woke up there was a question waiting for me and 40 more minutes of installation time.
  3. My NVidia graphics adapter wasn't working after the upgrade. And installing it with apt-get didn't work either. I had to get the drivers from the NVidia web site, not an easy task when all you have is a text console and w3m.
But all in all everything went fine and I've been using my brand new Ubuntu release since morning. If you're using Ubuntu, click the button!

Saturday, April 21, 2007

3 Cheers for Open Source!

I'm a great user and adept of free software, but I must confess that I'm more attracted to the "free beer" side of things rather than the "free speech".

But for some reason each time I change a bit of open source code and make things work just like I want them to, it gives me an enormous satisfaction! There's 3 episodes that I really enjoyed on my open source adventures:

1. I patched the linux kernel! It was just a small patch to make my CD-Rom drive work, but it was tremendously rewarding to see the little light blink on that drive! (I didn't publish this one because it was a really old cartridge 1x CD-Rom drive)

2. I patched Kannel. This was amazing because I did the patch at the same time someone asked for it on the mailing list. So I send it to the mailing list and it is now part of the Kannel code!

3. I've been trying out Total Commander on Windows. It's a really good file manager and has an iPod Plugin. Turns out the plugin doesn't work with newer iPods. But since the source is available at the author's site, I downloaded it and fixed the problem! (I'm now talking with the author to get the patch published)

The funny thing is I believe I would've done the same even if the software wasn't free as in "free beer". Actually I would be thrilled to be able to fix some bugs and annoyances in some paid applications. Unfortunately I don't have access to the source code, so I'll just have to live with them...

Friday, April 6, 2007

Wacom Graphire 4

I bought a Wacom Graphire 4! I'm an engineer, not a designer, but I do like to make the occasional drawing and I was on the lookout for a pen tablet for a while.

I bought it yesterday and installing it was as smooth as you would expect... just plug it in and it works, add a few drivers and you can use all features (so far I only installed it on Windows). I was very happy to see that neither the pen nor the tablet need bateries. Just plug in to the USB port and everything is working.

I installed Corel Painter Essentials 3 (it is bundled with the pen tablet) and started sketching. It's really awkward when you start, because you keep doing "mouse gestures" all the time. I raised my hand, moved it to the left and when I placed it down again I was surprised to see the pointer going way to the left instead of staying in the same place!

But I eventually got used to it and draw the mouse that you see here... My very first pen tablet drawing!

Wednesday, March 28, 2007

OutSystems Express Edition

If you're looking for a fast way to build an enterprise application, if you want to be able to change it even faster and if you want it for free, OutSystems Express Edition is the answer!

I've got to be honest here. I work for OutSystems so you may consider my opinion to be a little biased. But the great thing is that by subscribing to the beta program you can see for yourself how fast it is to create a web application using the OutSystems Platform.

So go ahead! Register now for the beta program, wait impatiently for the "Welcome to the Beta program email", take a look at the bundled IT Asset Manager and build your own web application!

Don't forget to send us all your feedback about the OutSystems Express Edition so we can improve the product! And feel free to exchange ideas with other OutSystems users at the OutSystems Community!

Happy developing!

Wednesday, March 7, 2007

Change Gnome Splash Screen

So you just changed your entire Gnome theme, your Ubuntu installation is finally that great shade of blue you really love, you customized your login screen to use transparent png's and it just sparkles and... After you login the gnome splash screen is still Ubuntu brown!

Don't worry! It can be fixed... and tested! Just create an image (jpg or png) and copy it to /usr/share/pixmaps/splash/. Now launch a terminal window and type gconf-editor. This will launch the Gnome Configuration Editor.

Navigate to apps >> gnome-session >> options and change the splash_image to your image name. That's it!

Now to test it without logging out. First install Xnest: sudo apt-get install xnest. Now go to a terminal window and type gdmflexiserver --xnest.

This will launch another login session inside a window, so you don't have to keep logging in and out to test your new splash screen!

Saturday, February 24, 2007

Touchpad in Ubuntu

Ubuntu installations come with a mouse setup software, but it is a generic software that only allows you to setup stuff like double-click timeout, pointers, speed, etc. If you have a touchpad and want to setup other parameters like tapping speed, you'll have to install GSynaptics:

sudo apt-get install gsynaptics


After installing the software you can find it in the System/Preferences/Touchpad menu. Try to click it and you'll get an error message!

GSynaptics couldn't initialize.
You have to set 'SHMConfig' 'true' in xorg.conf or XF86Config to use GSynaptics


To fix this you need to edit your /etc/X11/xorg.conf file (e.g. sudo gedit /etc/X11/xorg.conf) and find a section like:

Section "InputDevice"
Identifier "Synaptics Touchpad"
Driver "synaptics"
Option "SendCoreEvents" "true"
Option "Device" "/dev/psaux"
Option "Protocol" "auto-dev"
Option "HorizScrollDelta" "0"
EndSection


Before the EndSection add an option with the code Option "SHMConfig" "on".

Now you need to restart X. Make sure you save all your work, because restarting X will log you out. Now press ctrl-alt-backspace. Login and you should now be able to run System/Preferences/Touchpad.

If you still have problems using your touchpad, refer to this complete guide.

Monday, February 19, 2007

Google Earth on Ubuntu

Google Earth is a great software to explore your home planet and your neighborhood. But if you have an nVidia video card in Ubuntu you may experience some... rather strange results!

To solve this problem all you have to do is update to the latest nVidia drivers. But if you're lazy like me you're probably asking "Isn't there an easier way?".

Well, the answer is both yes and no. You do have to update the nVidia drivers, but Alberto Milone has a great script called Envy that does all the hard work for you.

Just follow the instructions on the website and in 5 minutes you should have Google Earth running without a scratch!

Tuesday, February 13, 2007

ICDSoft Appraisal

If you're looking for a hosting server, my advice goes to ICDSoft. I host my sister's in law website there and it has all the features I need (PHP, MySql, Ruby, email accounts galore, ...) and I never had a problem with it.

Of course not having problems isn't good enough reason to recommend a hosting service. That's the minimum they can do for you! The reason why I recommend ICDSoft is for their support. Let me tell you about my two experiences with them:

Ticket 1: I tried to place a Rails application on the website. For some reason I wasn't able to make it work, so I decided to contact support. In 5 minutes I had a reply with all the required instructions to make my application work.

Being new to Rails I didn't really understand the response... So I told them something like "I couldn't make it work. Please poke my code and see what is wrong. And fixe it while your at it". And can you believe it? They did look into my code, corrected my scripts, changed the permissions to make it all work and sent me a reply with all they had done... In less than 45 minutes! Now that is great support...

Ticket 2: Still working on my sister's in law Rails version of the website I decided to use RMagick to resize the images and create the thumbnails. I uploaded the website to my account to test it and it didn't work. ICDSoft doesn't have RMagick installed.

So I contacted support. I don't know how long they took to reply, but I think it was about 5 minutes like the first time. The reply said something like "We're talking to the sysadmins and we will contact you soon". And they did!

Less than 30 minutes later I had a reply stating that the sysadmins had installed RMagick. I tested my website again and RMagick was really working!

As a client, my feeling was that they were there working just for me! They edited my code, they installed a package on the server because I asked them to. Never a support service made me feel this pampered!

Wednesday, February 7, 2007

Compiling Drivel in Ubuntu

So you want to use Drivel to add your posts to Blogger, right? By this time you probably noticed that Drivel doesn't work with the new version of Blogger. Shame...

If you look around you'll probably find rumors that the CVS version of Drivel supports the new Blogger login... This is not true, but if you care to compile Drivel anyway here are the steps to do it:

  1. Get CVS: sudo apt-get install cvs

  2. Get the gnome development environment: sudo apt-get install gnome-devel

  3. Install libsoup. This should be easy, something like sudo apt-get install libsoup2.2-dev. Unfortunately it's not so easy. The Ubuntu version of libsoup is 2.2.96 and Drivel needs version 2.2.97! You must go to Debian and search for the needed packages. I've downloaded and installed this one, plus dependencies.

  4. For some reason during the installation of the libsoup dependencies (the libxml) I had to do a apt-get install -f. This made some libs disappear, so I had to run sudo apt-get install gnome-devel again.

  5. Now get the Drivel source from CVS. Instructions on how to do this can be found at their site.

  6. Now just type ./autogen.sh followed by make.


You can now start hacking the code and add support for the new Blogger Login API! :)

Tuesday, February 6, 2007

Registry Tips

Here's some tricks you can use to make the Windows Registry work for you:

Add a command to the context menu

Add a key to the HKEY_CLASSES_ROOT\[EXTENSION]\shell with the name of the application you'll be using (e.g. SourceEdit). In the default value, insert the name you want to appear in the context menu (e.g. "SourceEdit").

Inside the currently created key, add another key called "command". In the default value of the command key, add the command that will be invoked (e.g. "c:\Program Files\Source Edit\SrcEdit.exe" %1).

Note: [EXTENSION]can be "*" for all files.

Setting command completion in cmd

In the key HKEY_LOCAL_MACHINE\SOFTWARE\Microsoft\Command Processor set the value of CompletionChar to 9.

Setting an application path to launch from the "run" window

In the key HKEY_LOCAL_MACHINE\SOFTWARE\Microsoft\Windows\CurrentVersion\App Paths create a new key with the name of the application you want to launch (e.g. ue.exe). Set the default entry to the application you REALLY want to launch (e.g. c:\Program Files\UltraEdit\uedit32.exe).

.reg Files

Adding an entry:

REGEDIT4

[HKEY_CURRENT_USER\DummyTree]
"ValueToBeRemoved"="Value"


Removing a tree:

REGEDIT4

[-HKEY_CURRENT_USER\DummyTree]


Remove an entry:

REGEDIT4

[HKEY_CURRENT_USER\DummyTree]
"ValueToBeRemoved"=-

Thursday, February 1, 2007

Vertically align images

Ever tried to vertically align an image inside a div? I tried to find an easy solution for this problem but couldn't find anything that worked on the web, so here's the solution I found.

But first, let me go back to the problem. Imagine you're creating a photo gallery website. Being a Web 2.0 kind of guy you place the thumbnails inside divs, something like:

<div class="thumb">
<img src="mythumb.jpg" />
</div>


Your css might look something like:

.thumb {
width: 120px;
height: 120px;
}

.thumb img {
vertical-align: middle;
}


If your thumbs aren't all the same size (and 120x120) this approach will not work! All your thumbs will be top aligned instead of middle aligned.

The problem here is that the image is being aligned relatively to the height of the contents of the div rather than to the div height. To solve this problem we have to make sure the content of the div has the same height as the div itself.

The hack you can use to "fool" the div is to create an empty image with height 100%:

<div class="thumb">
<img width="0" height="100%" />
<img src="mythumb.jpg" />
</div>


The first image has no width nor source, to make sure it stays invisible. Because the height is 100% it will have the same height as the div (120px in this case). This means the content of the div has 120px height, so the "mythumb.jpg" image will be properly aligned.

I tried this trick with Firefox 2.0 and IE 7.0 and it worked fine. If you find any browser where this doesn't work, please let me know.

Wednesday, January 31, 2007

Image Size on Ruby

If you need to know the dimensions of an image file in ruby, for example because you want to set the "width" and "height" properties of an image on a web page, here's how to do it:

Start by getting libimage-size. If you're using Ubuntu you can fetch it using sudo apt-get install libimage-size-ruby.

You can now use the ImageSize class to fetch the width and height of your image. There are several ways of doing this, so here's one:

open(image_path) do |fh|
img_size = ImageSize.new(fh)
end
puts "Width: #{img_size.get_width} Height: #{img_size.get_height}"